I’ve finally got the pictures of this scrapbook, which happens to be part 2 of my 3 series girly scrapbooks. It’s the cute girl collection by Crate Paper. If you haven’t already seen part 1 of this scrapbook you can check it out here: Cute Girl Scrapbook. All three scrapbooks were made using the cute girl collection of paper, however I’ve also included bits and pieces from Maggie Holmes bloom collection.


When I purchased the materials, I might have overdone it a little. Ok, a lot. But when you see these pictures, you will understand my obsession with this collection of scrapbook paper. Check it out!
See my Scrapbooks page for basic details on how to construct this book. The dimensions for this book measure: Front cover and back 8” x 8” with the side binding measuring at 8” x 4”.
I also included an eyelet at the top of the binding. See below. Most of the tassels came from Maggie Holmes Bloom Collection as well.

Here is a side view of the scrapbook. It did end up pretty thick when I added all the embellishments. Notice the corners of the pages have a pink hue to it. That’s distressing ink by Tim Holtz. I use this in most all of my scrapbooks. I use a rubber stamper with a sponge tip to help apply the ink to the edges. I’m in love with that bright pink ink. It really makes my pages stand out.

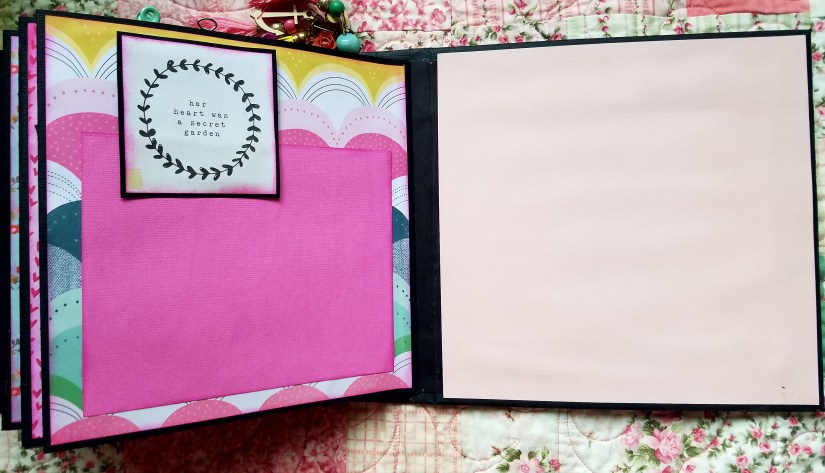
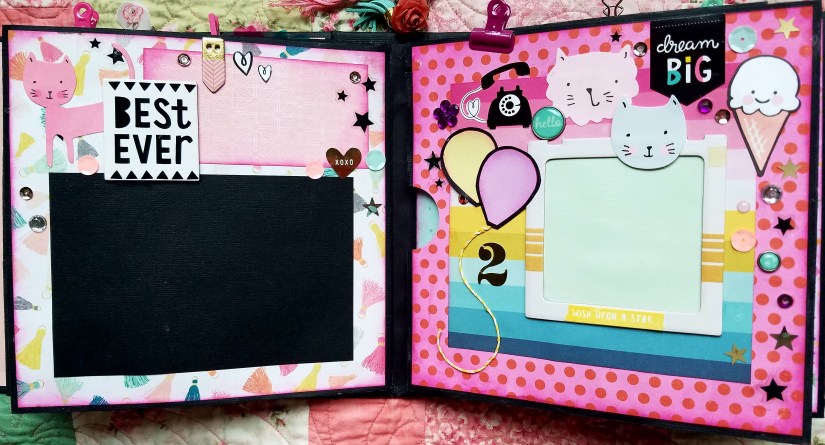
Page 1:
I love looking at the scrapbook from this angle. It shows just a sliver of each page and all the fun colors. I try to rotate my paper on each page to provide an assortment of fun colors.

This page flips open to the right twice. It’s hard to explain this but hopefully the pictures will help you understand.

When you flip it to the right, it opens up to this view. . .

Flip it open again. . . and now you have it completely open. 
Page 2:
Page two has doors that open. In the photo below, you can see they are secured with some yellow twine.
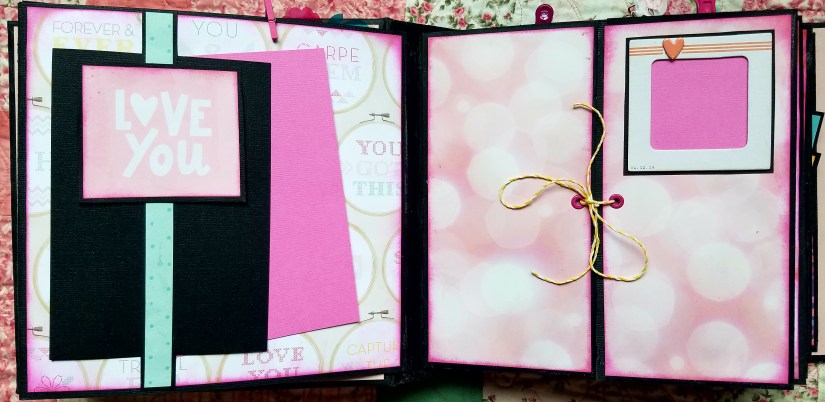
Open the doors up and this is what you see. . . .

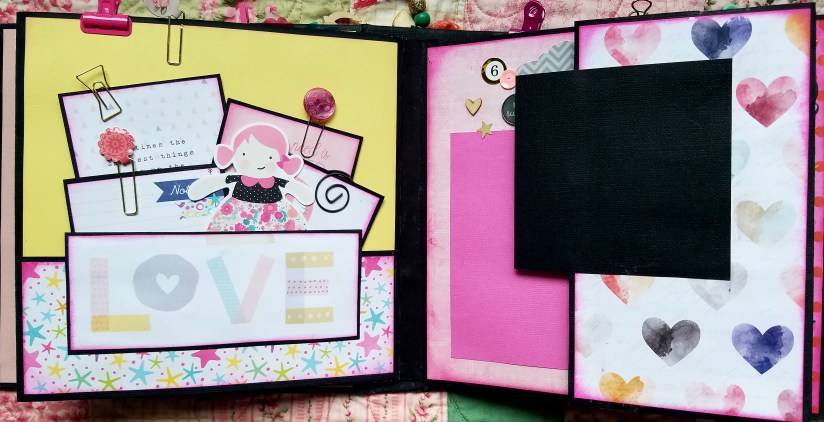
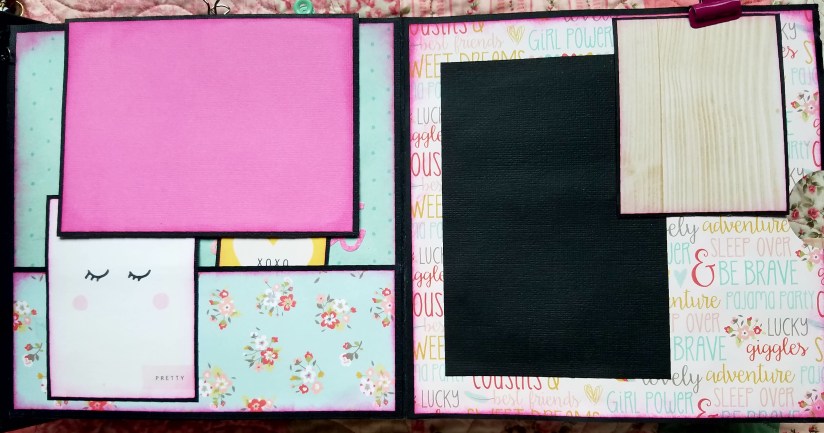
Page 3:
Looking below, on the left hand side you see the back of page 2. It features a pocket with a bunch of journal cards. On the right hand side is the beginning of page 3 and features a fold out page. The black square at the center is a photo matte spot for putting a picture. when you flip that open to the right. . .
You can now see the full page. Which includes another little side pocket.


Page 4:
Looking on the right hand side you can see the face of page 4. If you look near the center of the two pages you will notice a crescent shape hole. This is a tab for opening up the fold out page. You can see it in the next photo below as well. . .
In this picture, you can see that tab all the way on the right hand side. This is where the page folds open.
Page 5:
This must be my favorite page in the entire scrapbook. I would seriously consider doing another book, just with this line of paper. This came from Echo Park’s Let’s Be Mermaids collection. On the left, you see a pocket for placing photos or journal cards. On the right is a door enclosure that’s secured with yellow twine. When you untie the string and open up. . .
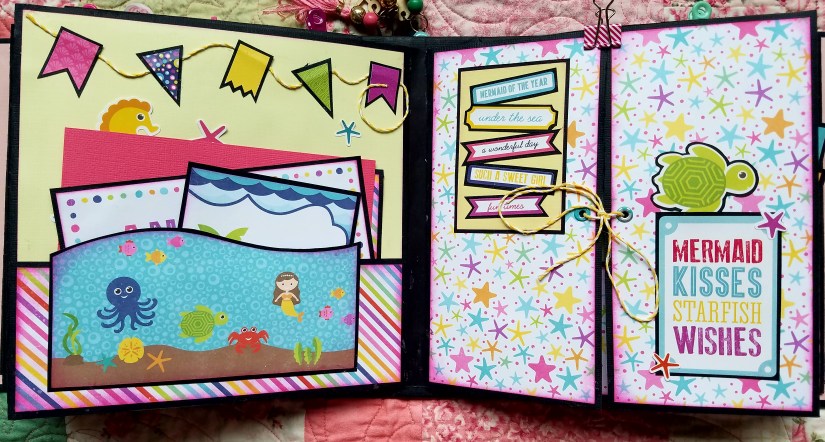
You see this beautiful colorful mermaid page. At the center is a pocket and to the left and right side is a waterfall layout. Flip these cards up and you have places to write little details.


Page 6:
The first photo below on the left shows the face of page 6. You can see the photo to the right has been flipped open. The bottom picture shows how it’s flipped open again. This is a double fold. You can see how I secured it with this teal clip toward the top.


Page 7:
I usually only do 6 pages, but I had to add a seventh page just to fit everything in this book. Looking down at the right hand side. The face of this page features a pocket with a ton of journal cards. When you open it up. . . 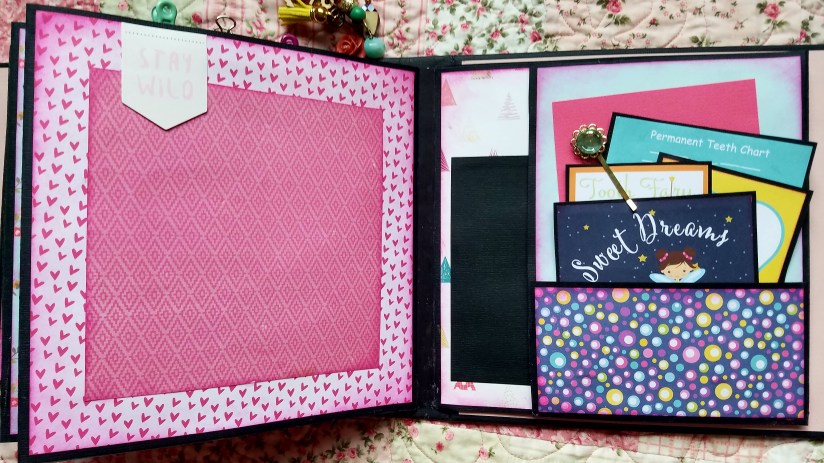
You see this below.

Then flip to the back page and you see this.